Hydroponic pea shoots look like a microgreen and run like a bulk seed operation. The seeds are large, sown by weight, soaked before sowing and matted into a root layer that has to lift clean at harvest — so seed handling, tray throughput and airflow decide the outcome more than any nutrient recipe. This guide covers the legume specifics only; the general workflow is covered separately under growing microgreens hydroponically.
It is written for teams sizing a shoot line for the first time, and for microgreen farms that lose pea trays to mould or uneven stands.
Where Hydroponic Pea Shoots Differ From Other Microgreens
Legume shoots are a weight game, not a count game. Brassica microgreens are sown as thousands of small seeds and sold by the gram; pea shoots are sown as hundreds of grams of large seed per tray and sold by the kilogram, changing the seed bill and the equipment.
- Seed size and cost: bought by weight, sown by weight, and the largest variable cost per tray — often ahead of labour.
- Soaking: pea seed is soaked before sowing, a step most microgreen lines do not have and most equipment catalogues do not mention.
- Stand height: shoots are cut at a target height, so racks need more vertical clearance.
- Single cut with optional regrowth: the first cut is the product; a second is possible but smaller, unlike the repeat cuts in baby leaf regrowth.
The fit question is covered in microgreens versus baby leaf; below assumes legume shoots are chosen.
Seed Handling: Soaking, Sowing Rate and Seed Health
Seed is the crop. A pea line stands or falls on germination percentage and seed-borne disease, so legume hydroponic production starts with the seed lot, not the tray. Buy by weight from lots with stated germination, and inspect each batch on arrival per the incoming seed inspection routine.
The soaking step is where lots are won or lost:
- Soak in clean water for a planning range of 8–12 hours at moderate temperature — enough for even imbibition, short of splitting or souring. Confirm on your own lot.
- Drain and surface-dry before sowing; wet seed bridges in hoppers and sticks to metering parts.
- Sow onto a pre-wetted mat, then stack or cover for germination in a controlled room — the germination room setup applies directly.
- Never reuse soak water between batches.
The failure we see most often in first-year lines is seed, not technique: one lot germinates strongly, the next runs visibly patchy, and the schedule breaks because nobody re-tested. Check germination on every new lot.
Sowing Density and What It Actually Changes
Density trades kilograms per tray against mould risk. Heavier sowing gives more stems but a tighter, wetter canopy; lighter sowing gives taller shoots with more air through the stand, at lower cut weight.
Work in seed weight per tray area, set from trial trays, and watch what moves it:
- Target cut height: short wholesale bunching runs denser than tall “tendril-on” chef shoots.
- Room conditions: warm, humid rooms push the workable density down.
- Tray format: standardise on one tray specification so the rate is repeatable.
Whatever the rate, sow evenly — gaps waste area, and clumps stay wet and go mouldy first.
Mechanising Sowing and Cutting

Legume shoots mechanise better than most microgreens — the seed is large and the harvest is one clean cut — but soaked seed changes what the machinery can do, and buyers find that out late.
Sowing options, in rising order of throughput:
- Hand sowing from a scoop covers a few hundred trays a week and is how most lines start; it is less consistent between operators than it looks.
- Drum and plate seeders handle large seed well once it is drained and surface-dried; needle seeders designed for small seed generally do not — see automated seeding lines.
- Soak-and-sow integration is a tank, drain and dwell step ahead of the seeder: plumbing rather than a machine purchase, and it belongs in the room layout from day one.
Cutting is the other half: a band blade or reciprocating harvester set to a fixed height cuts a tray in seconds and holds the specification between operators, and hand knives do not. Cut-to-pack flow then follows harvest and packing line logic — trays in one end, weighed bags out the other, roots to compost without crossing the food path.
Mould: The Failure That Ends Pea Lines
Mould is why most failed pea shoot projects failed. A dense, freshly irrigated stand in still air suits Botrytis and damping-off organisms, and a mouldy tray is written off, not treated.
The controls, in the order they pay back:
- Air movement first: horizontal airflow across the canopy does more than any product could. Design it before the racks go in, adapting HAF fan practice to the room.
- Irrigation discipline: water the mat, not the canopy, and keep the room out of the wet, still band — the targets in humidity control and VPD apply to shoot rooms too.
- Tray sanitation: root mats and seed debris hold inoculum, so trays are washed and disinfected every turn — the cleaning between cycles routine, with a product from the sanitiser comparison.
- Density and seed health as above — patchy, over-sown trays from an untested lot are where mould starts.
Diagnose early failures with the damping-off triage: the cause is usually air, water or seed.
Pea Shoot Cycle Length and Tray Throughput
Plan a pea shoot cycle of roughly 10–14 days from sowing to first cut in a moderate room — two to three days germinating under cover, the rest growing to target height under light. Warm rooms shorten it, cool rooms and a taller specification lengthen it.
Throughput is then a tray-counting exercise:
- Standing area: the cycle means every weekly volume stands in the room for its full length, not just on harvest day.
- Turns per rack per year: cycle plus a clean-out day sets how often each tray position earns — model it the way farm KPIs treat occupancy.
- Regrowth is a bonus: a second cut is cheaper per tray but smaller and slower.
Farms that quote a cycle off a supplier sheet and then find their room runs two days slower learn the difference between a crop calendar and a delivery commitment.
Microgreen Legume Yield: The Band Worth Planning Against
Model microgreen legume yield as a multiple of sown seed weight, then discount it. As a planning band, a healthy stand returns roughly 2.5–4 times the sown seed weight at first cut, assuming a tested lot with good germination — lower for tall chef specs, higher for short wholesale cuts.
Two adjustments most first models miss:
- Trim loss at packing: stems below the cut and clumped or yellowed material come off the scale, so plan a deduction before pricing.
- Moisture loss: cut shoots lose weight fast at ambient temperature; post-harvest cooling protects both weight and shelf life.
Run the result through the cost-per-kilo method with seed, labour, tray washing and power as the lines. Seed dominates, so a lot that germinates five points better is usually worth more than any equipment upgrade.
What About Bean Sprouts Soilless
Bean sprouts are a different crop on different equipment. Mung beans are sprouted in the dark, in rotating drums or deep bins with frequent water changes and no light stage — bean sprouts soilless production is a water-management line, not a rack-and-light line.
Before folding sprouts into a shoot business:
- Food safety scrutiny is higher: raw-eaten sprouts are a recognised high-risk category in many markets, with specific requirements on seed sourcing, water testing and batch records for every lot.
- Nothing transfers: trays, racks, seeders and cut lines from a shoot room do not serve a sprout line, so treat it as a separate investment case with its own buyer.
The pairing can work — both lines buy seed by the tonne and live on hygiene — but each case must stand alone.
FAQs About Legume Shoot Production
How long does a crop of pea shoots take?
Roughly 10–14 days from sowing to first cut in a moderate room, with two to three days of that germinating under cover. Warm rooms shorten it; a taller specification lengthens it.
Do pea shoots need nutrient solution?
Very little for the first cut — the seed carries the crop — so the recipe matters less than seed quality, water cleanliness and airflow.
Why do our pea trays go mouldy when our brassica trays are fine?
Density and canopy structure: pea shoots stand taller and denser over a wet mat, so air that keeps brassicas dry holds moisture in a pea canopy. Fix airflow first.
Can our existing microgreens seeder handle peas?
Test before buying. Drum and plate seeders handle large, drained, surface-dried seed well; needle seeders designed for small seed generally do not.
Is a second cut from the same tray worth scheduling?
It can be, for accounts that accept a shorter, leafier regrowth — the tray cost is already paid. Expect less weight for a similar number of days.
Related Reading
- Growing Microgreens Hydroponically: A 7-Day Crop — The seven-day microgreen crop, and how legumes differ from it
- Incoming Inspection of Seeds and Growing Media: Batch Acceptance on a Commercial Farm — Batch acceptance checks before a short-cycle crop is sown
- Germination Chambers and Propagation Room Setup — Propagation room setup for high-density tray crops
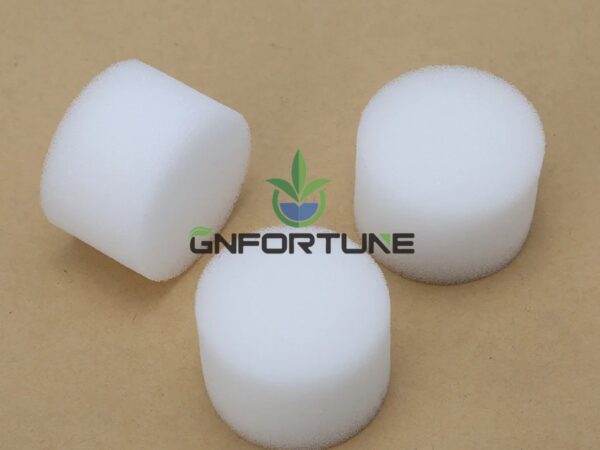
- Propagation Media: Rockwool, Foam and Sponge — Rockwool, foam and sponge as the sowing surface
- Hydroponic Rack Systems: Multi-Layer Beds, Shelves, Racks — Multi-layer beds, shelves and racks for tray crops
Next Step: What to Send for a Quotation
A legume shoot line is quoted from tray counts and turnaround, so rack layout, benching, irrigation and wash capacity follow from the weekly tray volume. Suppliers asked to quote without a tray format will size the room like a nursery.
Planning a pea shoot or legume shoot line? Send for RFQ or project consultation: room or greenhouse dimensions; target weekly output in trays or kilograms; cut specification and whether regrowth is scheduled; tray format and racking preference; room temperature range and existing ventilation; raw water analysis; intended sowing and cutting method; existing wash and pack capacity; delivery schedule; and the budget band. G AND N FORTUNE LIMITED supplies trays, irrigation zones and matched greenhouse packages.