

By the G&N commercial engineering team · First published: September 2026 · Reviewed for field accuracy
Cleaning and sanitizing a hydroponic system between cycles is the single most under-rated step in a commercial greenhouse. Operators who run NFT, DWC, or dutch bucket systems for years will tell you the second crop after a bad sanitization round is where Pythium and biofilms start costing real money — wilting tips, slow growth, and a yield drop that the books can never quite explain. This SOP is the version we walk new operators through on site: the chemicals we use, the order, the contact times, and the three cheap tests that tell you whether the system is actually clean before you re-fill.
Why “Rinse With Water” Is Never Enough
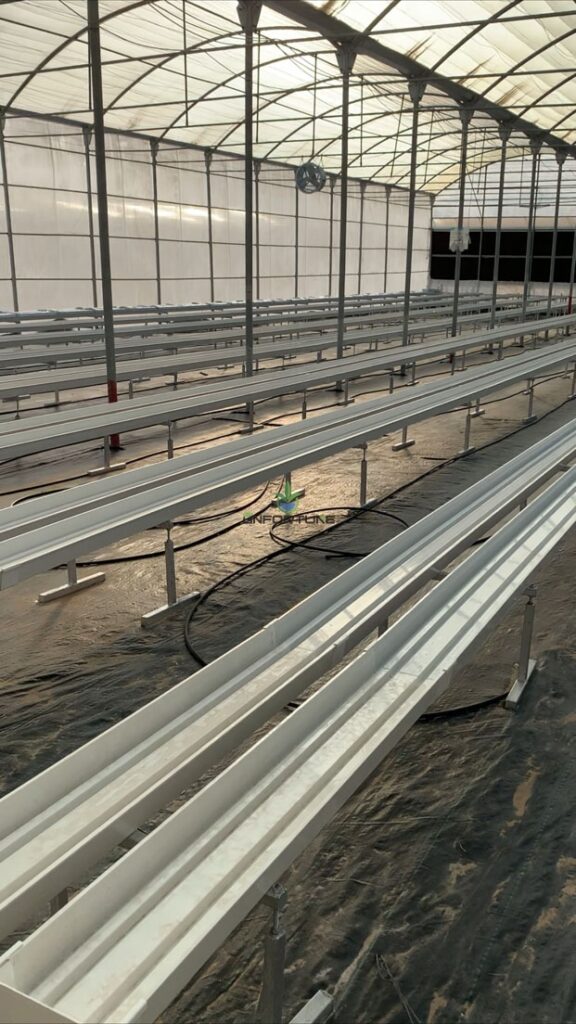
Empty cleaned white hydroponic gutter channel between crop cycles, ready for sanitizing and replantingA pressure wash and a clear drain look like a clean system to the eye. Under a 10× hand lens, the same channel usually has a slimy biofilm that re-colonizes the next crop within days. Three things make rinsing alone a losing strategy:
- Biofilm is a physical layer. Bacteria and fungi secrete a polysaccharide matrix that water cannot penetrate. Without a surfactant or an oxidizer, you are polishing the top of the biofilm, not removing it.
- Pathogens survive as resting structures. Pythium oospores, Fusarium chlamydospores, and several viruses can sit in dry channels for weeks and re-infect on contact with the next root system.
- Mineral scale shelters biology. Iron and calcium deposits create a rough surface where microbes anchor. Acid cleaning strips that scale; alkaline or oxidizer cleaning strips the biology on top.
Cleaning Chemicals We Use: H2O2, Chlorine, Peracetic Acid, Citric Acid
No single chemical cleans everything. The four below each have a specific job, and getting the order wrong is one of the mistakes we fix on site most often — operators either use one chemical for everything or they mix oxidizers with acid and create a hazard.
| Chemical | Typical concentration | Contact time | What it removes | Notes & cautions |
|---|---|---|---|---|
| Hydrogen peroxide (H2O2, 35%) | 100–200 ppm | 10–20 min circulation | Biofilm, soft algae, some pathogens | Breaks down to water and oxygen; safe on roots if flushed; UV-stabilized grades last longer in solution |
| Sodium hypochlorite (chlorine) | 100–150 ppm free Cl | 15–30 min soak | Bacteria, viruses, surface fungi | Corrodes aluminum and some stainless; pH 6.5–7.5 required; rinse thoroughly before planting |
| Peracetic acid (PAA) | 50–100 ppm | 10–15 min circulation | Bacteria, fungi, spores, biofilm | Strong oxidizer; works at low temperature; check food-contact clearance for the specific grade |
| Citric or phosphoric acid | 1–3% | 30–60 min soak | Iron scale, calcium carbonate, mineral deposits | Always run acid before oxidizer; clears anchor points for biofilm |
The on-site trap we see twice a year: operators mix chlorine and acid in the same circuit. The result is chlorine gas — toxic to workers and corrosive to the greenhouse. Always run an acid wash, flush with clean water, then run the chlorine or peroxide wash. Never let an oxidizer and an acid share a flooded system.
Step-by-Step SOP for NFT Channels
NFT channels are the easiest system to clean badly because biofilm hides in the corners and around inlet/outlet fittings. The eight-step version we run after a crop comes out:
- Drain and remove plants. Pull all slabs and net pots; do not leave root mat in the channel.
- Dry brush. Stiff nylon brush along the channel to lift dry scale and root debris before any water touches the surface.
- Acid wash. Circulate 1–3% citric or phosphoric acid for 30–60 min; this strips iron and calcium scale so the oxidizer can reach the biofilm underneath.
- Flush with clean water. Drain EC should be within 0.2 mS/cm of the input water before you move on.
- Oxidizer wash. Circulate H2O2 (100–200 ppm) or PAA (50–100 ppm) for 10–20 min; channel walls should look wet-shiny, not slimy.
- Brush again during the oxidizer wash. The second brush removes biofilm the first pass loosened.
- Final flush. Flush until drain EC matches input; chlorine-treated channels need a longer flush to clear residue.
- Inspect and dry. Look into each channel with a torch; the surface should be uniformly matte plastic. Wet pockets are where the next biofilm will start.
Channel profile and lid geometry change how a brush reaches the corners. Round-bottom channels clean faster than square-bottom channels because there are no internal corners.
SOP for DWC Tanks and Dutch Buckets
DWC tanks and dutch buckets share the same logic as NFT channels but with one extra risk: bulk volume means any residue gets diluted across the whole tank, so under-dosing is more common than over-dosing. Six steps:
- Drain and remove plants. Pull all lids and growing media; rinse roots out of the tank with a hose before any chemistry.
- Scrape walls. A plastic scraper removes the visible root mat and algae ring at the waterline.
- Acid wash. Fill to working level with 1–2% citric acid; circulate or agitate for 30 min. Drain.
- Oxidizer wash. Fill to working level with H2O2 (150 ppm) or PAA (80 ppm); let stand 20 min with aeration running, which keeps the oxidizer in contact with all surfaces.
- Drain, flush, refill. Two full-volume flushes; the second flush EC should match input within 0.1 mS/cm, then refill and re-balance to the new crop’s EC and pH.
For dutch buckets, soak them in a chemical bath instead of circulating. Two buckets per batch in a 200 L drum of PAA at 80 ppm for 15 min is enough; rinse and let dry before reassembly.
Contact Time, Concentration, and Rinse Water Testing
Concentration alone does not sanitize — contact time does. A 200 ppm chlorine solution that touches the surface for 30 seconds does very little; a 50 ppm solution that sits for 30 minutes does a lot. Two practical rules:
- Concentration × time is the dose. Doubling the concentration lets you roughly halve the contact time, but only within the supplier’s stated limits.
- Rinse until the EC matches. The cheapest verification tool is the same EC meter you use for nutrient solution. If the drain EC is within 0.2 mS/cm of the input water, the chemical is gone.
For drip-irrigation lines feeding NFT or dutch buckets, the same oxidizer wash must circulate through the drippers; otherwise biofilm inside the nozzle is the source of next crop’s blockage. A chemical flush through the drip line is part of the standard drip irrigation SOP.
Validating Clean: ATP Swab, EC Drift Check, Plant Bioassay
Looking clean is not the same as being clean. Three cheap validation methods catch what the eye misses:
- ATP swab. A luminometer swab turns light in proportion to the ATP on a surface, reported in relative light units (RLU). A clean channel typically reads under 100 RLU on the wall.
- EC drift check. After refill, set the nutrient to the new crop’s target EC. If EC drifts more than 0.2 mS/cm in the first 24 hours with no plant uptake, residual chemical is still reacting with the new solution.
- Plant bioassay. Put a few test seedlings (lettuce, basil) in the cleaned system 48 hours before the main planting; if they show leaf burn or root browning, the system is not clean enough.
Biosecurity: Footbaths, Tools, and Visitor Flow
The cleanest NFT channel is re-contaminated in a day if workers walk soil into the system on their boots or if pruning tools carry last cycle’s sap into the new planting. Biosecurity is the half of sanitization most operators forget:
- Footbaths at every entry. A shallow tray with 1% PAA or quaternary ammonium stops soil-borne pathogens at the door. Replace the solution daily; a fouled footbath is worse than none.
- Dedicated tools per bay. Color-coded pruners, one color per bay, prevent a single contaminated tool from wiping out the cleanest section.
- Visitor flow. Visitors walk the youngest bays last; never from a known infected bay into a clean one. Workers move youngest to oldest, not the reverse.
The cheapest insurance a greenhouse can buy: a footbath at every door and one pair of boots per bay. The cost is trivial and it breaks the contamination path that no chemical wash can fix after the fact.
A clean channel re-exposed to Pythium-positive water fails again within weeks — see the Pythium guide for cross-reference.
FAQ
How often should a hydroponic system be sanitized?
A: Between every crop as a minimum, and immediately after any sign of root disease. A full acid-plus-oxidizer sanitization belongs between crops.
Can I use the same chemical for both NFT and DWC?
A: Yes — the four chemicals above work for both, but contact time and concentration vary by system volume. DWC tanks need higher total chemical mass.
Is chlorine or hydrogen peroxide safer for food crops?
A: Both break down to food-safe residues at working concentrations when rinsed properly. H2O2 breaks down to water and oxygen and is generally the safer choice for organic or food-contact-sensitive operations.
What is the cheapest way to confirm the channel is sanitized?
A: The EC drift check after refill costs nothing beyond a meter you already own. If the drain EC matches input and the refill EC does not drift in the first 24 hours, you have passed.
Get the Full Cleaning SOP for Your System Type
Send your system type (NFT, DWC, dutch bucket), greenhouse area, and crop through the quote form, and our engineering team will return a downloadable SOP with chemical concentrations, contact times, and a per-bay cleaning checklist — the same wholesale and shipping terms apply for one bay or twenty.
— G&N Fortune Limited · hydroponic equipment manufacturer since 1996 · Reviewed by the engineering team