Dutch Bucket System: What “Complete” Actually Means
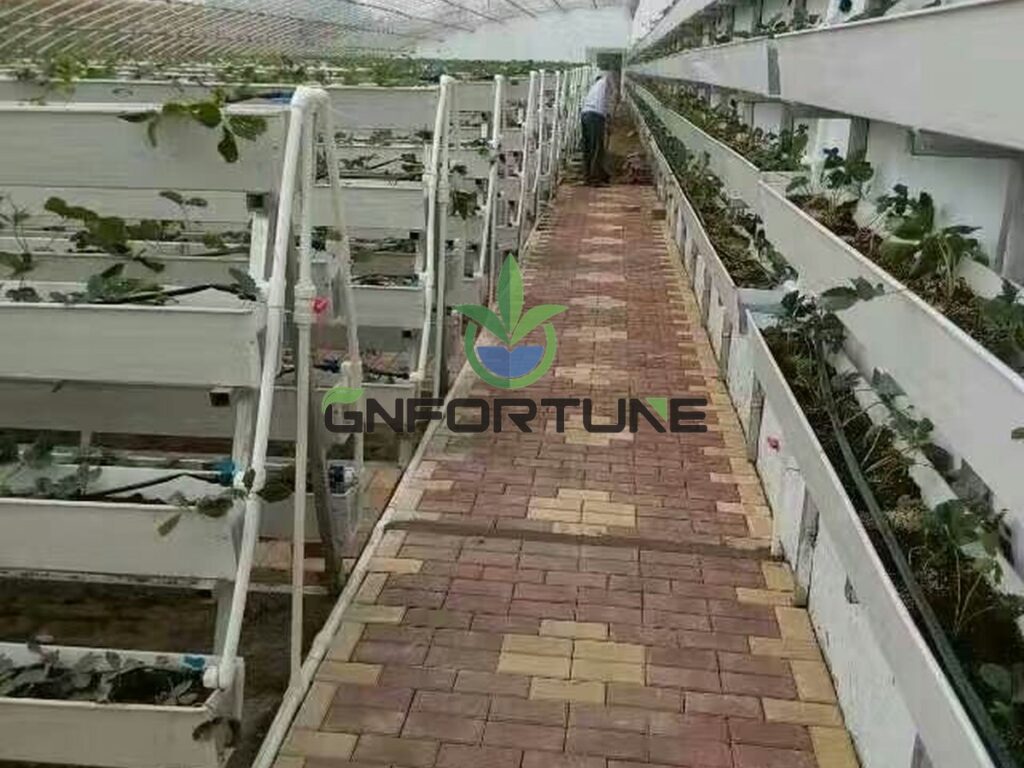
A commercial Dutch bucket hydroponic system may look straightforward on a drawing: each plant grows in an individual container, receives nutrient solution through a drip line, and drains through a fitting into a collection line or return system. However, reliable operation depends on how the reservoir, pump, filtration, manifold, emitters, bucket drainage and pipe layout work together. This guide explains the main components and layout decisions that should be checked before specifying a commercial Dutch bucket installation.
If you are still comparing growing methods, our Dutch Bucket vs NFT hydroponics comparison explains where each system fits before you finalize a greenhouse layout.
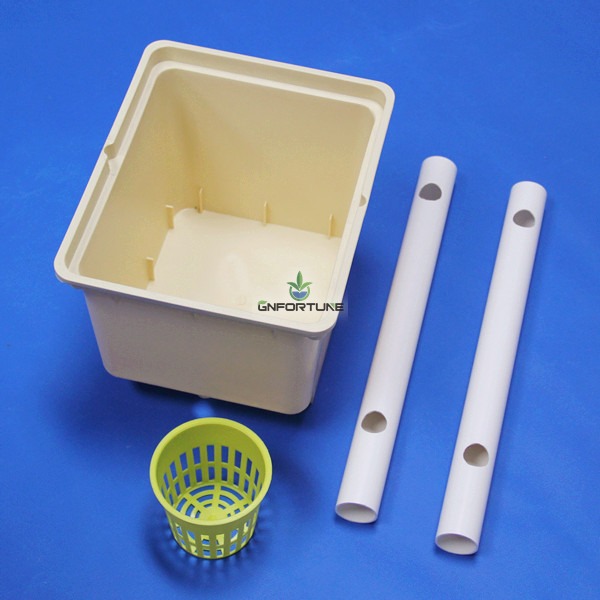
In commercial growing, “Dutch bucket” and “Bato bucket” are often used interchangeably. On G&N’s GN02 product page, Bato bucket is identified as the original trade name, while Dutch bucket is the common name used by growers. Bucket dimensions, drain fittings, outlet positions and return connections can still vary by model, so check the selected product’s specifications before finalizing the pipework. See the GN02 Dutch Bucket product details for G&N’s configuration. The layout guidance below focuses on individual bucket growing systems using drip irrigation and a defined drainage or return path.
Dutch Bucket System Components: From Bucket to Reservoir
In a commercial Dutch bucket system, nutrient solution moves from the reservoir through a pump, filter and supply manifold to the emitters. After reaching each bucket, excess solution drains through the bucket outlet or siphon fitting into a collection line. Depending on the system design, the drainage can return to the reservoir or be discharged separately. Every component needs to work together to maintain consistent delivery and make routine maintenance practical.
Growing media
Perlite, coco coir and suitable blends are commonly used in substrate-based systems. Select media according to water-holding capacity, aeration, particle stability and crop requirements. The actual fill volume should match the usable capacity and geometry of the selected bucket rather than relying on one universal media volume.
Drain fittings and collection lines
Match the siphon elbows and outlet connections to the bucket model. Collection pipe diameter, slope and section length must be calculated according to drainage volume and the number of connected buckets. Include accessible cleanouts so sediment and root debris can be removed without dismantling the entire row.
Supply manifold and irrigation laterals
The mainline distributes nutrient solution to individual growing zones, while PE laterals and microtubes deliver it to each bucket. As a preliminary reference, commercial layouts may use 50–63 mm uPVC mainlines, 16–25 mm PE laterals and 3–4 mm microtubes. Final dimensions depend on total flow, row length, pressure loss and the number of active zones.
Drip emitters
Emitter type, flow rate and quantity depend on crop demand, plants per bucket, irrigation duration and operating pressure. For example, G&N’s drip design guide discusses different configurations for tomatoes, cucumbers, peppers and eggplants. See our Dutch bucket drip irrigation design guide for emitter selection and flow calculations.
Filtration
Install suitable filtration before the irrigation manifold to protect small emitter openings. A 120-mesh filter is a useful starting reference in many drip applications, but the final filtration rating must match the emitter manufacturer’s requirements and source-water quality. Disc filters are worth considering where coco coir and perlite release fine particles.
Reservoir and pump
Reservoir capacity should account for crop water demand, irrigation cycles, replenishment capacity, solution management and operating reserves. Select the pump using the required zone flow and total dynamic head, including pipe, filter and fitting losses. Always check the actual duty point against the pump curve. See our hydroponic reservoir and pump sizing worksheet.
Fertigation and monitoring equipment
Commercial installations may include nutrient dosing equipment, EC and pH monitoring, water-level sensors and flow or pressure monitoring. Recirculating systems should also monitor return-solution EC and source-water quality so nutrient accumulation can be managed.
When comparing supplier quotations, check that every bidder specifies the bucket model, fittings, growing media, emitters, irrigation pipes, filtration, pump duty point, reservoir capacity and drainage arrangement. Comparing bucket prices alone does not provide a reliable picture of the complete system cost.
Dutch Bucket System Layout: Row Spacing, Bucket Spacing and Aisles
A commercial Dutch bucket layout needs to account for more than the number of buckets that fit inside a greenhouse. Row spacing, plant spacing, drainage routes and working aisles all affect how the growing area operates.
The spacing figures below are preliminary planning references, not universal installation standards. Actual dimensions should be checked against the crop variety, canopy size, trellis arrangement, greenhouse structure, harvesting method and selected bucket configuration. Actual dimensions should be checked against the crop variety, canopy size, trellis arrangement, greenhouse structure, harvesting method and selected bucket configuration.
| Layout Parameter | Preliminary Planning Reference | What Needs to Be Considered |
|---|---|---|
| Row spacing | 1.2–1.5 m for tomatoes and cucumbers; 1.0–1.2 m for peppers | Crop canopy, trellis arrangement, light access and plant maintenance. |
| Bucket spacing within a row | 0.35–0.5 m for vine crops; 0.25–0.35 m for strawberries and herbs | Plant variety, growing habit, training method and target planting density. |
| Service aisle width | 0.9–1.2 m | Worker access, harvesting carts, equipment movement and maintenance. |
| Drainage section length | 25–40 m per section | Total bucket count, drainage volume, pipe diameter, slope and outlet arrangement. |
| Drainage pipe slope | 1–2% | Pipe diameter, connection positions, elevation differences and drainage capacity. |
These figures should be checked against the actual greenhouse plan before construction. In particular, drainage pipe length and slope should be calculated together rather than selected independently.
Estimating Bucket Density Per Square Metre
As an initial planning reference, approximately 0.9–1.3 buckets per square metre can be used to discuss greenhouse capacity after allowing for service aisles, headlands and equipment areas. This is not a guaranteed planting density for every crop or layout. It should not be treated as a guaranteed planting density for every crop or layout.
The actual bucket count depends on the usable growing area, row arrangement, bucket spacing and the space required for harvesting and maintenance.
Growing media also affects the practical layout. A filled bucket can be considerably heavier than an empty one, particularly when the media is wet. The preliminary estimate of 12–15 kg refers to a 12 L bucket filled with wet coco coir. Verify the actual bucket capacity, media type and moisture conditions before using this figure for structural load calculations or handling plans; it should not be applied directly to G&N’s 11 L GN02 bucket.
Cucumber installations may use two plants per bucket in some growing configurations, but the planting arrangement should be determined by the variety, training method and production plan. See our Dutch bucket cucumber growing guide for more crop-specific considerations.
Before confirming a commercial installation, ask the supplier to show the bucket positions, row spacing, working aisles and drainage routes on the greenhouse layout drawing. This makes it easier to check both growing capacity and day-to-day operating access before equipment is ordered.
Dutch Bucket Drainage Systems: Recirculating vs Drain-to-Waste
Drainage design is one of the most important decisions in a commercial Dutch bucket installation. Once excess nutrient solution leaves the bucket, it needs a defined route. Depending on the project, it may be collected and returned to the reservoir, discharged separately, or managed through a combination of both approaches.
The right choice depends on water availability, source-water quality, crop management, disease-control requirements, local discharge regulations and the operating budget. Neither recirculation nor drain-to-waste is automatically the better option for every greenhouse.
Recirculating Dutch Bucket Systems
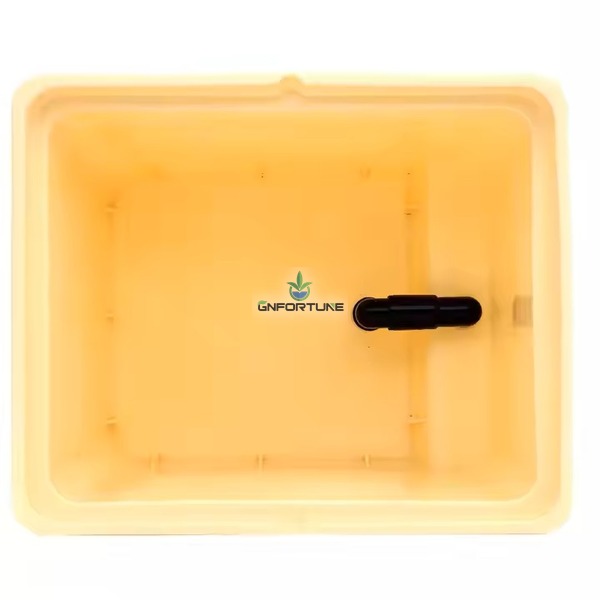
In a recirculating system, excess nutrient solution flows from the buckets into a collection pipe and returns to a reservoir. The collected solution can then be assessed and managed before being reused.
This arrangement can help reduce water and fertilizer consumption, particularly where water availability is limited or replacement water is expensive. However, returning drainage to the reservoir also requires more attention to water quality and nutrient management.
Before choosing recirculation, consider:
- Water quality: Source-water sodium, chloride and other dissolved salts can accumulate as the solution circulates.
- Filtration: Root debris, growing-media particles and other contaminants need to be managed before the solution returns to the reservoir.
- EC and pH monitoring: Check the nutrient solution regularly and assess changes in both feed and return solution.
- Disease management: A shared return line can provide a route for certain root pathogens to move between growing areas.
- System redundancy: Return pumps, collection pipes and reservoir arrangements need to be accessible for inspection and maintenance.
Drain-to-Waste Dutch Bucket Systems
In a drain-to-waste arrangement, excess nutrient solution leaves the buckets and is discharged or collected separately rather than returned directly to the supply reservoir.
This approach gives growers more separation between individual irrigation cycles and reduces the risk of distributing contaminants through a shared return solution. It can also simplify nutrient management when source-water quality or crop disease history makes recirculation difficult.
However, drain-to-waste systems require careful management of water and fertilizer consumption. The destination of the discharged solution must also comply with applicable environmental and wastewater regulations.
Important considerations include:
- Water consumption: Plan for the additional water required to replace discharged solution.
- Fertilizer consumption: Nutrients leaving the growing system cannot be recovered through the same return loop.
- Drainage capacity: Collection pipes and discharge routes must accommodate the expected runoff.
- Environmental requirements: Confirm how nutrient-rich drainage can be collected, treated or disposed of at the project location.
Hybrid Drainage Arrangements
Some commercial installations are designed with the flexibility to collect drainage separately and decide whether it should be reused or discharged.
This arrangement can provide additional operating flexibility, but it also requires more careful pipework planning, monitoring equipment and clear operating procedures.
Before selecting a hybrid arrangement, establish how the collected solution will be assessed, what conditions allow reuse and when it must be discharged. These decisions should be based on crop requirements, source-water quality, nutrient management and the project’s operating procedures.
Comparing the Three Drainage Approaches
| System Type | Main Advantages | Main Considerations | Suitable Project Conditions |
|---|---|---|---|
| Recirculating | Can reduce water and fertilizer consumption by reusing collected nutrient solution. | Requires return plumbing, filtration, solution monitoring and disease management. | Projects where water conservation and nutrient recovery are important and solution quality can be controlled. |
| Drain-to-waste | Simplifies separation of used drainage from the supply reservoir. | Higher water and fertilizer replacement requirements, plus wastewater management. | Projects where source-water quality, crop management or disease-control considerations favor separate drainage. |
| Hybrid | Offers flexibility in managing collected drainage. | More complex plumbing, monitoring and operating procedures. | Projects requiring different drainage-management options as operating conditions change. |
Whichever arrangement you choose, the drainage line needs to remain accessible. A collection pipe buried without inspection points or cleanouts can make routine maintenance difficult. Include suitable access points when planning the pipe route, and make sure the collection system can be inspected without dismantling the growing rows.
For more detailed information about irrigation lines, emitters and nutrient delivery, see our Dutch bucket drip irrigation design guide.
Sizing Dutch Bucket Pumps, Emitters and Reservoirs
Pump and reservoir selection should start with the irrigation demand of the growing area, not simply the number of buckets in the greenhouse. The number of active emitters, their flow rates, operating pressure and irrigation zones all affect the equipment required.
For a commercial Dutch bucket installation, three calculations need to be considered together: the required irrigation flow, the pump’s operating duty point and the reservoir capacity needed to maintain a stable nutrient supply.
Calculating Irrigation Flow
Start by multiplying the number of active emitters by the rated flow of each emitter. For example, a 1,000-bucket tomato installation using two 2 L/h emitters per bucket would require 4,000 L/h if all 1,000 buckets were irrigated simultaneously.
This is a theoretical total emitter flow, not automatically the required pump specification. If the greenhouse is divided into irrigation zones, the pump should be sized according to the flow required by the active zone, together with the pressure losses throughout the system.
For a practical design, check:
- Number of buckets and plants in each irrigation zone.
- Number and rated flow of emitters per bucket.
- Whether all zones operate simultaneously or in sequence.
- Pressure losses through the mainline, filters, manifolds and fittings.
- The operating pressure required by the selected emitter.
Choosing the Right Pump
A pump needs to deliver the required flow at the actual operating head. For more information about equipment calculations, see our hydroponic reservoir and pump sizing worksheet. Its maximum flow rating alone is not enough to determine whether it will work properly in a commercial Dutch bucket system.
For the 1,000-bucket example above, the total emitter flow is approximately 4 m³/h. A manifold pressure range of 1.5–2.5 bar is included as a preliminary reference. Confirm it against the selected emitter specifications and the pressure losses between the pump and the most distant irrigation point before using it in a final equipment specification.
Ask the supplier to provide the pump curve and identify the expected duty point. Also consider whether the installation needs a backup pump, pressure monitoring or automatic changeover in the event of equipment failure.
Estimating Daily Water Demand
Daily irrigation demand varies with crop type, plant growth stage, greenhouse temperature, humidity, growing media and irrigation management.
For illustration, assume a daily demand of 1.5–2.5 L per plant. With two plants in each of 1,000 buckets, the estimated daily demand would be 3,000–5,000 L. This is an example based on those assumptions, not a guaranteed water requirement for every tomato installation. This is an illustrative calculation based on those assumptions, not a guaranteed water requirement for every tomato installation.
The actual daily requirement should be established using crop data, irrigation records and drainage measurements. Where possible, review the water consumption of a comparable growing block before finalizing the reservoir and supply equipment.
Reservoir Capacity and Nutrient Management
Reservoir capacity should provide sufficient working volume for irrigation demand while allowing room for nutrient preparation, replenishment and routine solution management.
A recirculating system needs to account for the volume returning from the growing area, changes in nutrient concentration and any water or solution removed during maintenance. A drain-to-waste system has different replenishment requirements because discharged solution does not return to the supply tank.
Do not size a reservoir using daily crop consumption alone. Consider the number of active irrigation zones, peak demand, replenishment frequency, pump operation and the amount of solution that needs to remain available during normal operation.
Monitoring the System After Installation
Even a correctly selected pump and reservoir need to be checked after installation. Measure flow at representative emitters, including those near the beginning and end of the longest irrigation rows. Compare the readings and investigate significant differences before the crop reaches full production.
For recirculating systems, monitor feed and return solution EC and pH. Changes in return-solution readings can indicate nutrient accumulation, water-quality problems or the need to review the irrigation and drainage strategy.
| Design Check | What to Verify | Why It Matters |
|---|---|---|
| Emitter flow | Rated flow and actual output under operating conditions. | Helps identify insufficient or uneven irrigation. |
| Operating pressure | Pressure at the pump, manifold and representative end points. | Helps maintain consistent emitter performance. |
| Emitter uniformity | Compare measured output across the irrigation zone. | Highlights differences between the beginning and end of a row. |
| Filtration | Filter rating, source-water quality and emitter requirements. | Reduces the risk of blocked irrigation lines. |
| Reservoir volume | Working volume, replenishment capacity and operating reserve. | Helps maintain a stable nutrient supply. |
| Feed and return solution | EC, pH and changes in solution quality. | Supports nutrient management in recirculating systems. |
| Drainage volume | Actual runoff and the capacity of the collection system. | Helps identify drainage restrictions and changes in water use. |
Commissioning should include a flow and pressure check before the growing area is put into production. Recording these measurements also gives the farm a useful reference for future maintenance.
Common Dutch Bucket System Problems to Check Before Handover
Most problems in a commercial Dutch bucket installation do not come from the bucket itself. They usually develop somewhere between the irrigation supply, growing media, drainage connections and day-to-day maintenance.
These are the areas worth checking before the greenhouse starts full production.
Blocked Drainage and Poor Pipe Fall
Growing-media particles, root debris and other sediment can collect in drainage pipes over time. If the collection line is poorly positioned or difficult to access, drainage can slow down and cause water to accumulate around the bucket outlets.
Check the drainage route during installation, confirm that connections are secure and make sure inspection points are accessible. A drainage problem should be investigated at the pipework before changing the nutrient recipe without evidence.
Uneven Dripper Output
When emitters deliver different amounts of nutrient solution, plants in the same growing area may develop at different rates. The cause could be a blocked emitter, pressure loss, unsuitable pipe sizing or differences between emitter models.
Measure the output at representative points along the irrigation rows. Use compatible emitters within each irrigation zone and keep replacement parts available for routine maintenance.
Filtration and Water Quality Problems
Fine particles, algae and other contaminants can gradually affect filters and drip emitters. Water quality can also change during the growing season, particularly when the source water contains dissolved salts or suspended material.
Inspect filters regularly and establish a cleaning schedule based on the water source, filter condition and emitter requirements. For recirculating systems, also monitor changes in the nutrient solution rather than checking the supply reservoir alone.
Insufficient Access for Maintenance
A layout can fit a large number of buckets on paper and still be difficult to operate. Narrow working aisles, inaccessible valves and buried drainage connections make harvesting, cleaning and equipment replacement more difficult.
Walk through the proposed layout as if you were carrying out routine maintenance. Check access to pumps, filters, manifolds, collection lines and individual growing rows before approving the installation.
These checks are easier to carry out before the greenhouse enters production. Once crops are established, even relatively small repairs can interrupt irrigation and create unnecessary work for the growing team.
Frequently Asked Questions About Dutch Bucket Systems
How many Dutch buckets fit in 1,000 square metres of greenhouse?
As an initial planning reference, approximately 900–1,300 buckets may fit in 1,000 m², depending on row spacing, bucket spacing, service aisles and usable growing area. The actual capacity should be calculated from the greenhouse layout and crop requirements., but the actual capacity should be calculated from the greenhouse layout and crop requirements.
What size pump do I need for 1,000 Dutch buckets?
Start with the number of active emitters and their rated flow. For example, 1,000 buckets with two 2 L/h emitters each would require 4,000 L/h if all buckets operate simultaneously. The final pump selection must also account for operating pressure, pipe losses and irrigation zones. Always check the pump curve before specifying the equipment.
Should a commercial Dutch bucket system recirculate or drain to waste?
Both arrangements can work. Recirculation can reduce water and fertilizer consumption but requires filtration, solution monitoring and appropriate disease-management procedures. Drain-to-waste provides greater separation of used nutrient solution but requires additional water and fertilizer management. The choice depends on source-water quality, crop requirements and local discharge regulations.
How much growing media does each Dutch bucket need?
Media requirements depend on the usable capacity and internal shape of the selected bucket, as well as the type of growing media. Perlite, coco coir and suitable blends are commonly used. For G&N’s 11L Dutch bucket, check the actual internal dimensions and intended filling level before specifying the media quantity. Do not assume that every 11L bucket requires the same media volume.
How often should Dutch bucket filters and emitters be checked?
Filters and emitters should be inspected regularly throughout the growing cycle. Cleaning frequency depends on source-water quality, filtration performance and the amount of material entering the irrigation system. Check emitter output at representative points along the rows and investigate noticeable differences before they affect crop growth.
Plan Your Commercial Dutch Bucket System
Planning a new greenhouse or upgrading an existing growing area? The bucket selection, irrigation arrangement and drainage layout need to be considered together before equipment is ordered.
G&N Hydroponic supplies Dutch bucket products and growing-system components for commercial greenhouse applications. Share your crop type, greenhouse dimensions, estimated bucket quantity and preferred system configuration with our team. We can then better understand your requirements and discuss suitable product and system options.
To discuss your project, contact G&N Hydroponic with your initial project information. You can also message our team on WhatsApp.
Related Dutch Bucket Growing Guides
- Dutch Bucket vs NFT Hydroponics: Which System Should You Buy? — Compare system suitability for different crops and commercial growing projects.
- Designing a Drip Irrigation System for Dutch Bucket Rows — Learn about emitters, flow rates, pressure and irrigation line configuration.
- Hydroponic Reservoir & Pump Sizing Guide — Understand pump selection, water demand and reservoir sizing.
- Growing Cucumbers in Dutch Buckets: A Grower’s Guide — Explore crop-specific growing and irrigation considerations.